Table of Contents
Introduction
This article gives step-by-step instructions to help you see a satellite image of your house (or any building with an address, really) using Google Earth. It’s pretty easy.
Note: You cannot see a live satellite view of your house in real time for free on the internet. You just can’t.
To do that, you would have to be able to take control of the camera on a satellite, point it at your house, and zoom in. Nobody on earth has the capacity to let millions of random users control a camera on a satellite at the same time, which is what would be necessary for that. And they certainly wouldn’t let anyone use a satellite-based camera for free.
One company that does allow customers to access and directly task their imaging satellites is Maxar Technologies. Their services are aimed at government organizations and commercial clients with large budgets, typically those spending around $1 million a year or more under subscription contracts.
Google Earth works by compiling a massive database of satellite images which they combine to create a seamless collage that covers almost the entire globe in amazing detail. But the images they use are typically anywhere from a few weeks to a few years old, depending on the location and availability of updated imagery.
There is currently no official guidance from Google about the average age of the images used in Google Earth, but there are a lot of websites claiming the average image is 1 to 3 years old. I believe they all got that figure from an old post on the Google Earth blog that has since been deleted.
You can usually see the date of the image in your current viewing window on the right side of the bottom of the Google Earth image field. If you don’t see it, try zooming in. The “imagery date” (image capture date) should appear once you’re close enough. You can also turn on “historical imagery” to compare satellite images taken at different times.
To switch to historical imagery mode, click on the View tab in the top left and check the “Historical Imagery” box in the drop-down menu. This changes the images you see to (available) past images, and you can change the date of what you see by using the slider in the top left of the image field.
If you need a more recent or up-to-date image than Google Earth provides, services like SkyFi, Planet Labs, Arlula, and Plex-Earth offer on-demand or near-daily satellite imagery, though of course they charge a fee and are geared toward commercial or professional users.
Ok, so here’s how you can see a satellite image of your house:
1. Download and Install Google Earth Pro
The first thing you should do is download and install Google Earth Pro. You can use Google Earth on the web without installing it if you want to, but Google Earth Pro has features you may want later, particularly measurement tools, and it’s free. You can download Google Earth Pro here.
2. Open Google Earth
Launch Google Earth Pro (or Google Earth).
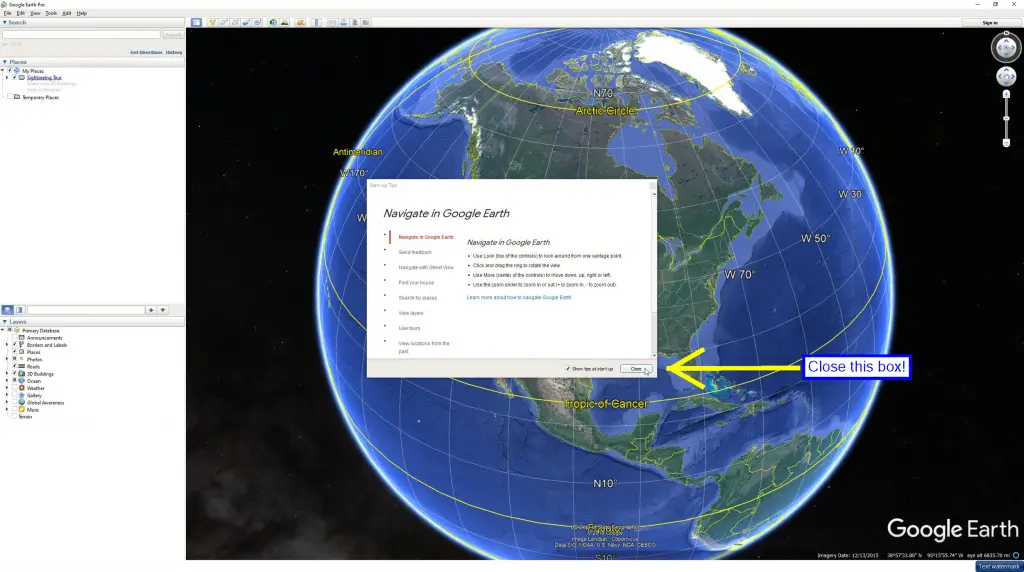
If this is the first time you’ve opened it, you’ll see a satellite image composite of the Earth with menus and tools around the sides of the screen, with a “Start-up Tips” box blocking the middle of the screen.
Close the “Start-up Tips” box.
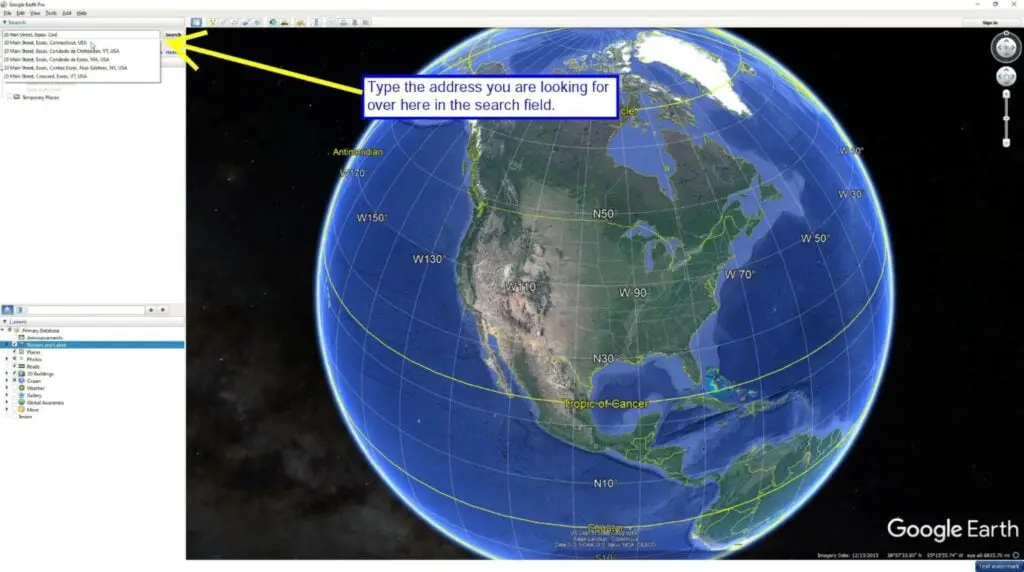
3. Search for the Address Where You Want to See a Satellite Image
In the top left corner of the screen, you’ll see a search field. Start entering the address of the house (or any other building!) that you want to see. Google Earth will offer suggested addresses below the search field as you type. When you see yours, click on it and it will appear in the search box. Or just type in the full address.
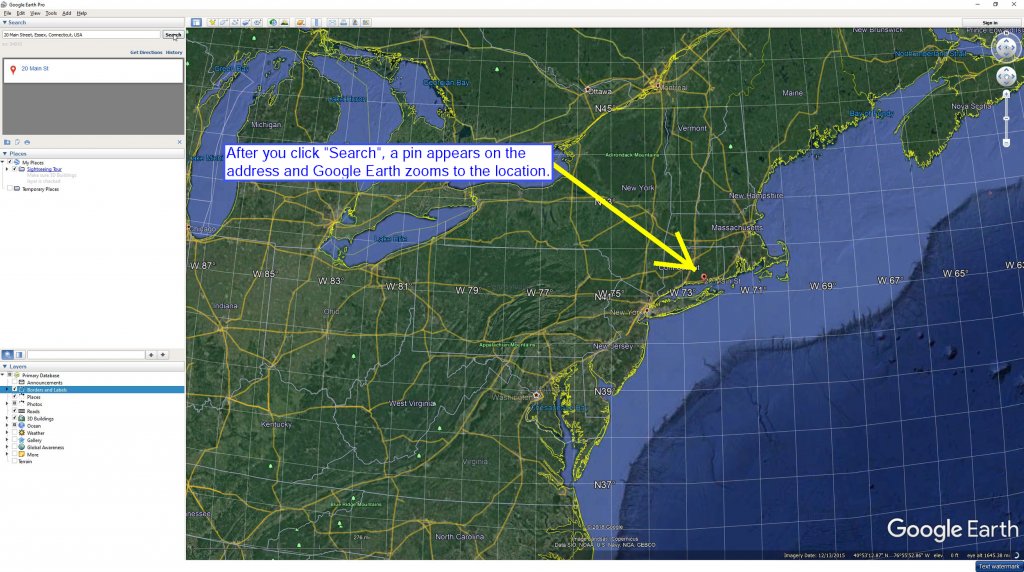
4. Watch as You Zoom to the Location
Once the correct address is in the box, click “Search”. Google Earth will now zoom you to that location.

5. Look for the Orange Pin
An orange pin appears at the address as the image field zooms to the location.
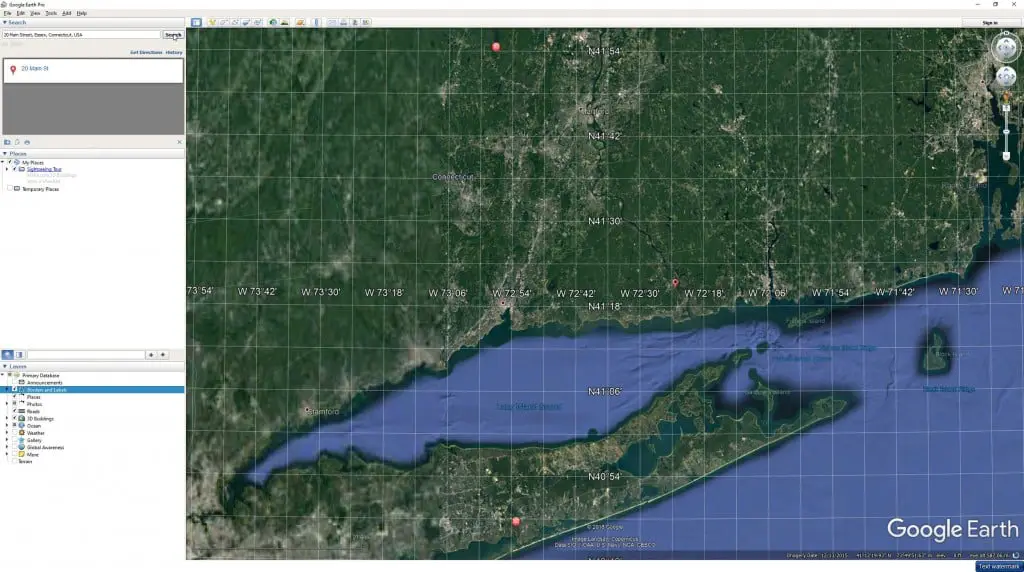
6. Wait Until You Stop Zooming
Still zooming! (Getting closer.)
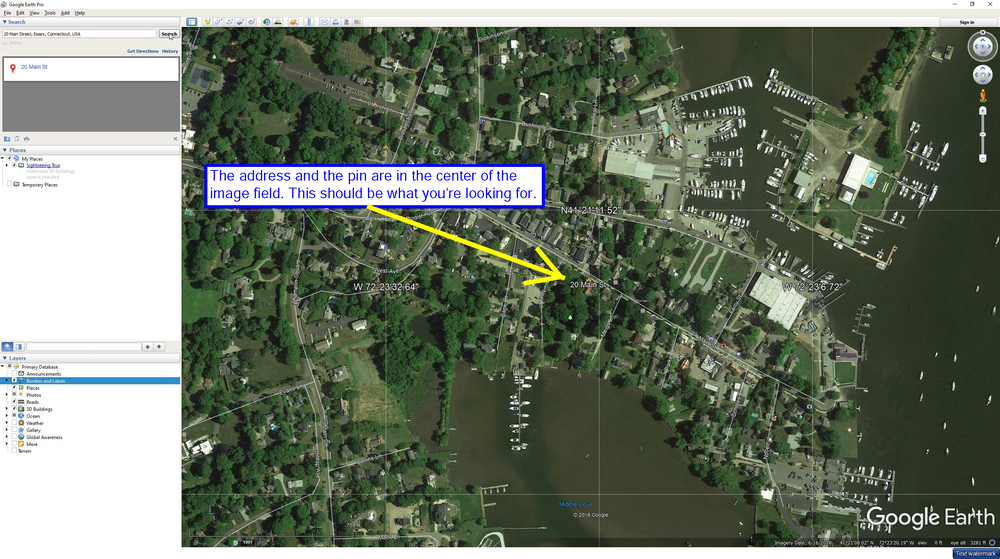
7. Make Sure the Pin is on the Address You Want
When Google Earth is finished zooming, the image field will be centered on your address and the pin. At this point, it will appear that you are looking down at your house from a few thousand feet.
Every once in a while, Google Earth will glitch, and the pin will not be on the right address, and may not even be particularly close. I’ve seen it be off by a couple of miles a few times for some reason. If you suspect this has happened, you should try entering a different, but very close, address. Like the address next door to the one you want.
If it still takes you to the wrong place, you’ll have to make sure street names, landmarks, and businesses are turned on, and use the context these things provide to hunt down your target location. This happens very rarely, but it does happen. Check the appropriate boxes in the menu at the bottom left corner in Google Earth to enable street names, etc.
8. Zoom in Closer with the “Zoom In” Tool
Now you’ll want to get a closer look.
There are two ways you can zoom in: you can use the zoom tool near the top right corner of the image field, or you can just scroll with your mouse wheel. If you scroll with the mouse wheel, you have to make sure that the mouse pointer is inside the general image field.
Note: The zoom tool (and the rotate tool above it) might not appear in the top right corner of the image field for you at first. If this is the case, in the menu bar on the top left, click on “View”, then click “Show Navigation”, then check the box for “Automatically”.

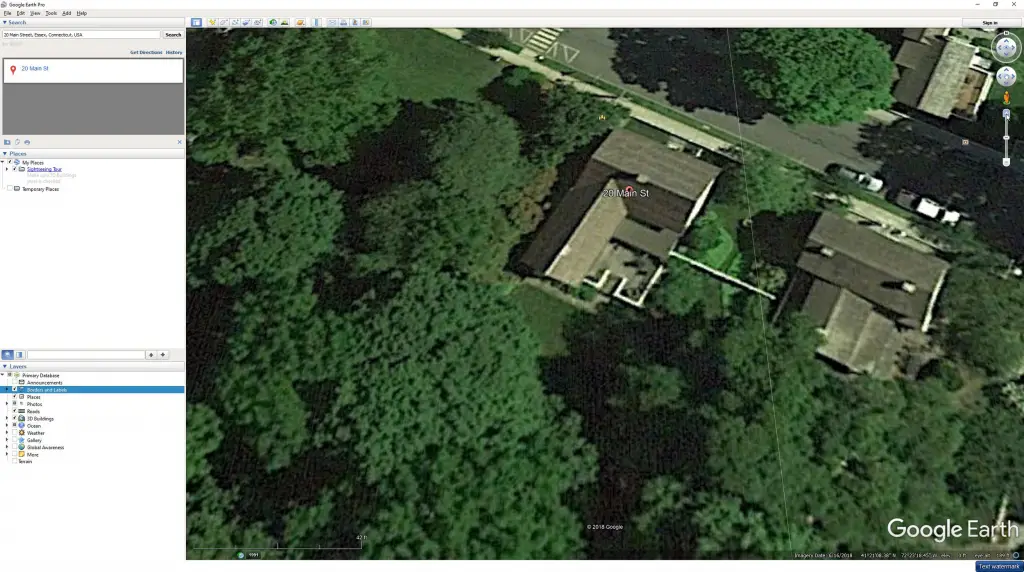
9. Limit to How Close You Can Get with Google Earth
The picture below is about as close as you can get without severely changing the viewing angle. If you try to get too close, you’ll switch over into “Street View”. If that happens, I explain a bit further down how to get the view back to where you’re looking straight down at the building.
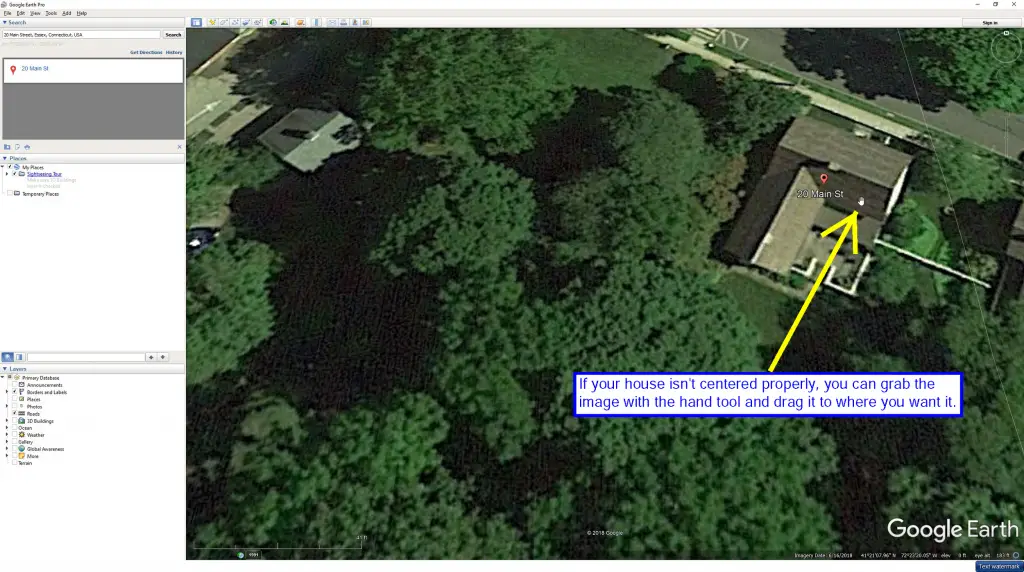
10. Center the Building in the Viewing Field
Especially for larger buildings, it really helps to center the building in the viewing window so you can zoom in closer and still see the whole roof/building. If your house isn’t centered in the image field, you can grab any spot in the image with the “hand tool” (the cursor) and drag the spot you grabbed into the center of the viewport.
To center your house in the viewport, put the mouse pointer (which turns into a little hand when it’s inside the image field) on your house and hold down the left mouse button. This lets you drag the house to the center of the image field.
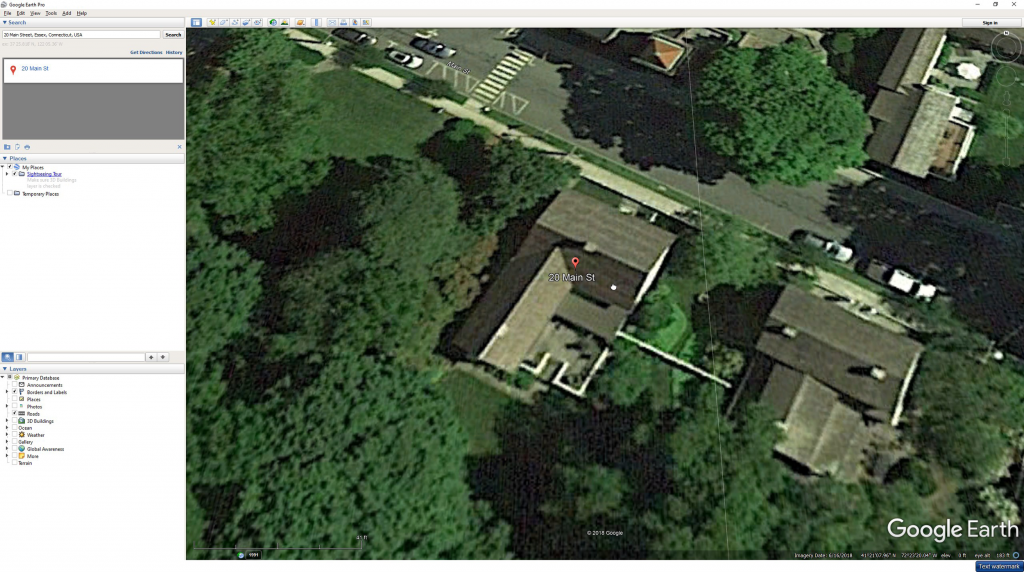
Centered! (After dragging it with the hand tool):
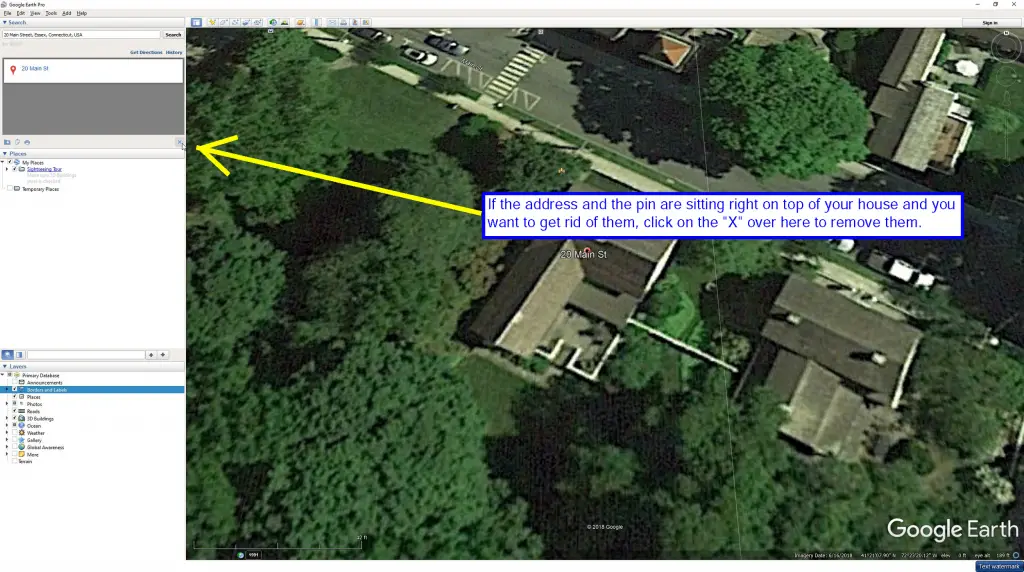
11. Remove the Pin and the Address From the Viewing Field
If the orange pin and the address text are sitting right on your house, as they are in our picture, you can remove them by clicking the “X” to clear the address search results box.
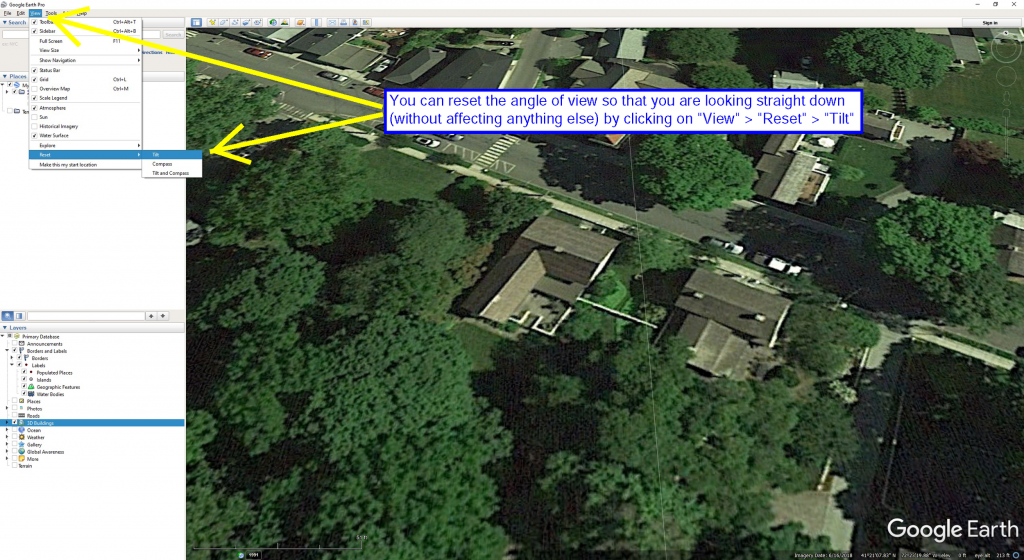
12. Reset the Viewing Angle for the Image
If the image is tilted so that it looks like you’re viewing your house at an angle, which can be irritating, you can fix this. The “Reset” function lets you reset the viewing angle.
At the top left, click on “View”. This opens a drop-down menu. Near the end of the drop-down menu, click on “Reset”. This opens another little menu to the right. Click on “Tilt”, and your view of your house will go back to where you’re looking straight down. If you’ve just spent time carefully orienting the image (see “Rotate the Image” below) so it’s lined up a certain way, like so the long side of the building is lined up with long edge of the viewport so you can fit more of the building on-screen, be careful not to reset “Compass” or “Tilt and Compass” or the image will rotate back to the standard north-at-the-top orientation.
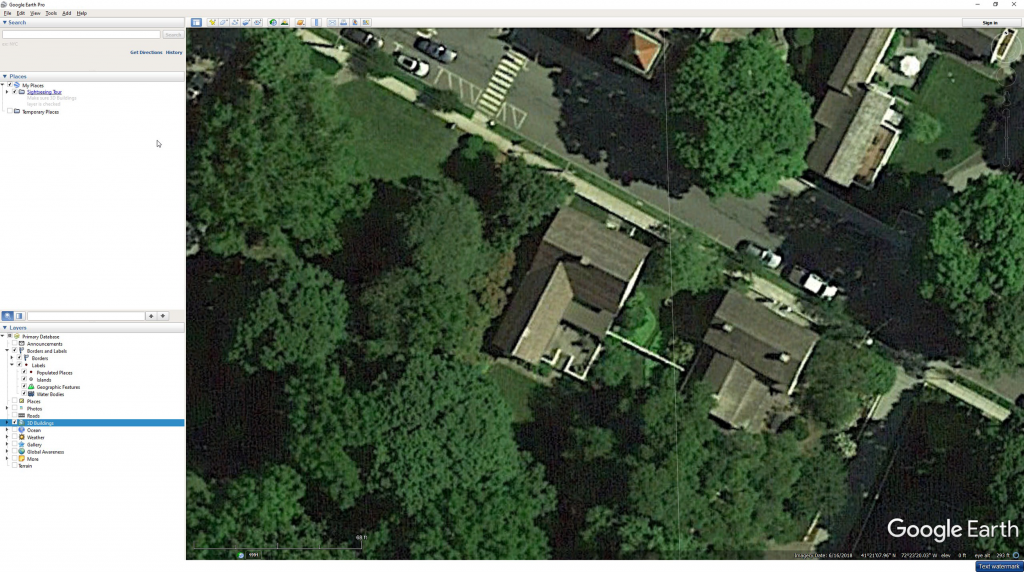
Back to a straight down view:
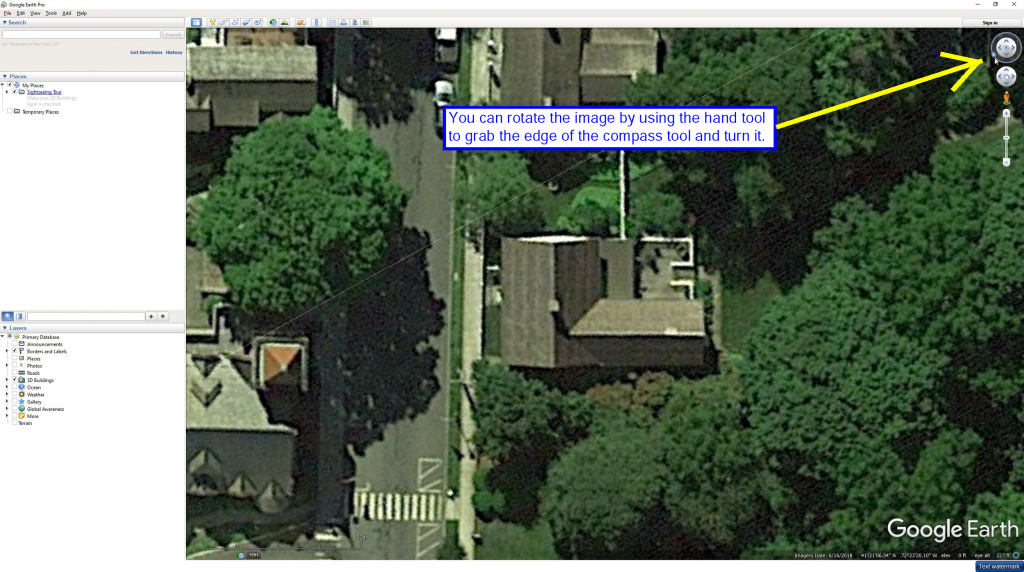
13. Rotate the Image
You can also rotate the image if you want to. Put the mouse pointer on the “N” on the little circle in the top right of the screen, hold down the left mouse button, and drag the “N” around the little circle. Clicking the left and right arrows inside the circle will also rotate the image.
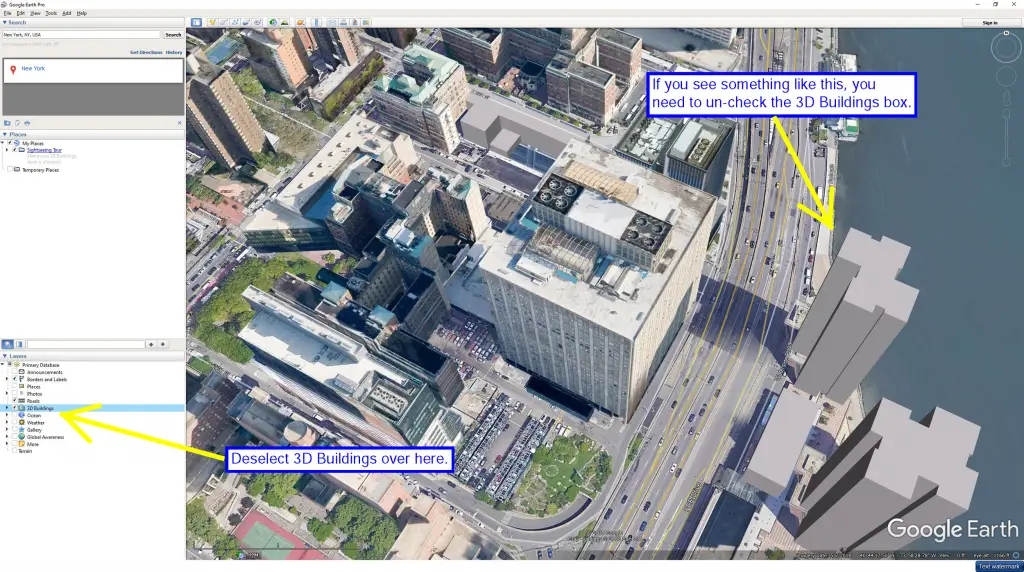
14. Turn “3D Buildings” On and Off
Your building may be in an area covered by Google Earth’s 3D Buildings function. If it is, you may see buildings which just look like featureless geometric shapes. You don’t want that!
You can turn off the 3D Buildings function by unchecking the box next to “3D Buildings” in the “Layers” menu near the bottom left of the screen.
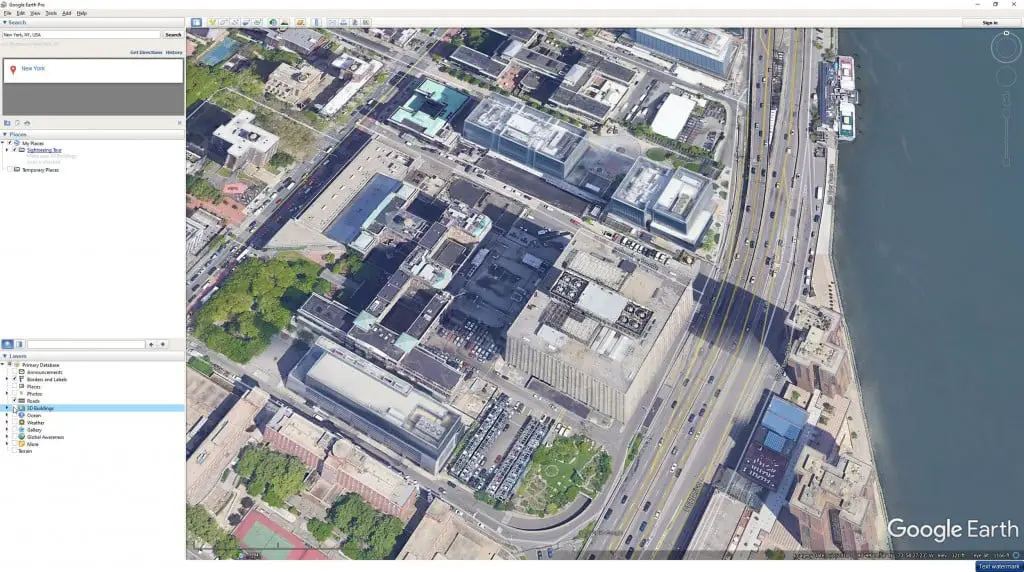
Same view as above, but with “3D Buildings” turned off:
And there you go, that’s how to use Google Earth to see your house (or any building, really).

About the Author
Jack Gray spent 20 years as a principal roof consultant with the Moriarty Corporation, an award-winning building enclosure consultant firm founded in 1967. Mr. Gray has worked in the roofing industry for over 25 years, with training and practical experience in roof installation, roof inspection, roof safety, roof condition assessment, construction estimating, roof design & specification, quality assurance, roof maintenance & repair, and roof asset management. He was awarded the Registered Roof Observer (RRO) professional credential in 2009. He also served as an infantry paratrooper in the 82nd Airborne Division and has a B.A. from Cornell University.