I participate in the Amazon affiliate program and may earn commissions from purchases made through links on this page.
Also see: Paver Weight Calculator & Chart for 11 Paver Materials
Table of Contents
Introduction
This paver calculator helps you estimate all the materials needed for a paver installation. The calculator allows inputs for installations where all the pavers are the same size as well as for repeating paver “modules” that use pavers of different sizes. It calculates the total number of pavers required, along with the amounts of base material, bedding sand, and joint fill for patios, walkways, driveways, etc. Below the calculator, you can find practical guidance on waste factors, paver sizes, layout patterns, base construction, edging, and other details that can help you get a more accurate estimate.
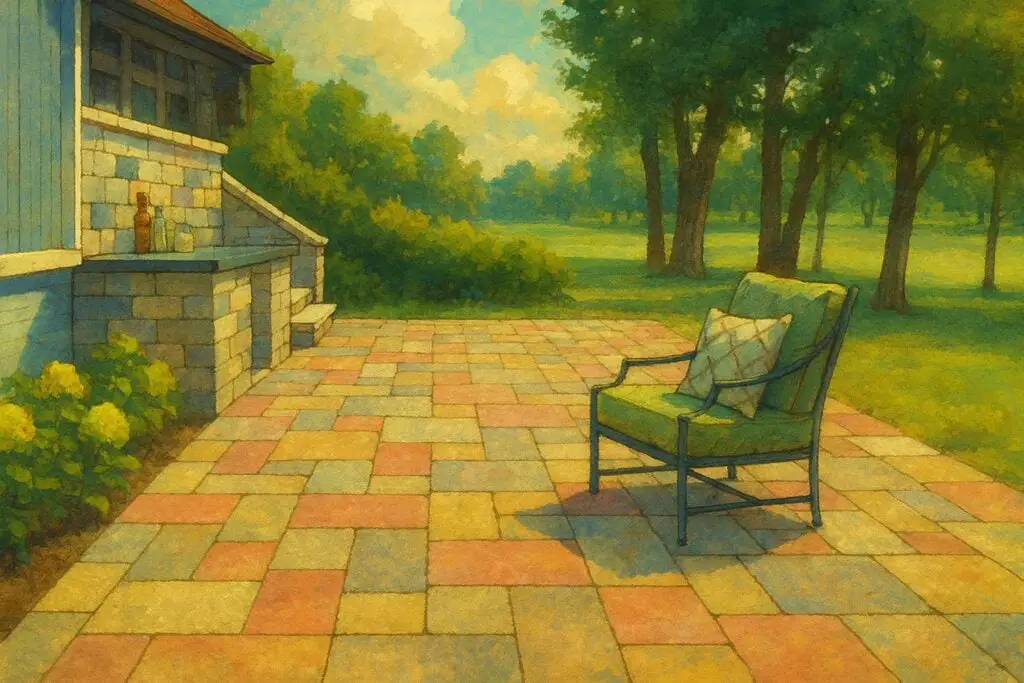
Paver Calculator
Notes on Paver Size Presets
- 3.625 in × 8 in → 0.20 ft²: standard brick size (modular clay brick; good for basketweave or running bond)
- 4 in × 7.75 in → 0.215 ft²: Holland brick paver (common for 45° or 90° herringbone)
- 6 in × 6 in → 0.25 ft²: small square paver (often used in modular layouts)
- 7 in × 7 in → 0.34 ft²: square cobble (pairs with 7 × 10.5 in for ashlar sets)
- 10.5 in × 7 in → 0.51 ft²: rectangle cobble or jumbo rectangle (often used with 7 × 7 in)
- 12 in × 12 in → 1.00 ft²: square slab (simple grids, patios, stepping pads)
- 12 in × 24 in → 2.00 ft²: plank/large format slab (modern look, linear patterns)
- 18 in × 18 in → 2.25 ft²: large square slab (fewer joints, heavier unit)
- 16 in × 24 in → 2.66 ft²: large rectangle slab (good for staggered ashlar)
- 18 in × 24 in → 3.00 ft²: large format rectangle (bigger patios, fewer cuts)
- 24 in × 24 in → 4.00 ft²: extra-large square slab (minimal joint lines, needs very flat base)
Waste Factor Tips
Choosing a realistic waste factor is an important part of estimating material quantities for any paver project. Waste does not come only from breakage. It also includes trimming at the perimeter, pattern alignment cuts, off-cuts that cannot be reused, color selection adjustments, and the damage during shipping that occur on nearly every project. The guidance below will help you understand why waste factors vary and how to choose an appropriate percentage.
Starting Point: Waste by Layout Pattern
The paver layout pattern has a big influence on trimming and cutting requirements. The ranges below reflect common installation results and real-world field behavior.
Running Bond
Typical waste: 3 to 7 percent
Description: This pattern uses pavers laid in parallel rows with each joint offset halfway across the unit below. It creates long, continuous lines and is one of the simplest and most efficient patterns to install. Straight edges create predictable trimming, and many off-cuts are reusable. Waste increases when the pattern is aligned to a specific sightline or when the patio dimensions force trimming on several edges.
Stack Bond
Typical waste: 3 to 6 percent
Description: Pavers are placed in a perfect grid with all vertical and horizontal joints aligned. It produces a clean, modern look with very simple perimeter cuts. Highly efficient because cuts are straight and reusable. Waste increases only when the project is small or when the pattern is rotated.
Basketweave
Typical waste: 6 to 10 percent
Description: This pattern alternates pairs of pavers laid horizontally and vertically to create a woven appearance. The alternating orientation introduces more trimming at the perimeter and reduces opportunities to reuse off-cuts.
Herringbone (45 degrees or 90 degrees)
Typical waste: 7 to 12 percent
Description: Pavers are laid in a V-shaped zigzag arrangement. The pattern interlocks exceptionally well but creates angled perimeter lines that require frequent trimming. Many of the resulting wedge-shaped off-cuts cannot be reused. Narrow patios often require significant trimming at both ends of each herringbone rail.
Ashlar or Random Modular
Typical waste: 10 to 15 percent
Description: This pattern uses two, three, or more paver sizes in a repeating module to create a natural, irregular look. The mix of dimensions limits the chances that a trimmed piece will fit into another part of the layout. Using multiple paver sizes reduces the likelihood that trimmed pieces will match a nearby opening in the pattern. Waste rises in small or irregularly shaped spaces.
Circular or Radial Patterns
Typical waste: 12 to 18 percent
Description: Pavers are arranged in concentric rings or arcs that radiate outward from a center point. The outer boundary forms a continuous curve, which results in trimming at almost every perimeter unit. Curved shapes produce fragments that are rarely reusable.
Long-format and Plank Patterns
Straight layout: 5 to 8 percent
Diagonal layout: 8 to 12 percent
Description: Long rectangular units, such as 4 by 16 or 6 by 24 pavers, are laid in straight lines or at an angle. The elongated shape creates longer off-cuts and more trimming at edges. Diagonal layouts add further complexity and increase trimming requirements.
These pattern-based values should provide your baseline waste factor. The sections below explain how to adjust your waste factor after that starting point and also provide typical waste ranges for each project shape when no layout pattern is being used.
How Project Shape Affects Waste
Different shapes interact with the paver grid differently. Understanding why this happens helps in selecting a realistic waste percentage.
For each shape below:
- The “Recommended waste factor” is the typical range if no formal pattern (running bond, herringbone, etc.) is being used.
- If you are using a layout pattern, add the noted adjustments to your pattern baseline.
Rectangles and Squares
Recommended waste factor: 5 to 10 percent
Adjustment to pattern baseline: add 0 to 3 percent
Rectangular shapes align cleanly with the paver grid. Trimming is limited to one or two edges unless the dimensions do not match the paver module.
Increase toward 8 to 12 percent when:
- Every side requires trimming
- The dimensions are small
- The pattern does not divide evenly into the project length and width
Circles and Curved Edges
Recommended waste factor: 10 to 20 percent
Adjustment to pattern baseline: add 4 to 10 percent
A curved edge cuts across the paver grid in many directions. Nearly every paver at the perimeter requires trimming, and almost none of the fragments can be reused. Smaller radii create more severe angles and typically lead to the highest waste numbers.
Triangles and Trapezoids
Recommended waste factor: 10 to 18 percent
Adjustment to pattern baseline: add 3 to 8 percent
Angled boundaries rarely match the paver grid. All edges require trimming and the resulting triangular fragments very seldom fit elsewhere.
Irregular or Multi-sided Shapes
Recommended waste factor: 12 to 22 percent
Adjustment to pattern baseline: add 5 to 10 percent
The more unique angles, jogs, insets, and changes of direction a project has, the more trimming is required. Waste naturally rises as shape complexity increases.
Other Conditions That Influence Waste
Overall Project Size
Smaller projects: A high proportion of the total area is near the perimeter. Cutting represents a larger share of the installation. Add 2 to 4 percent.
Larger projects: There is more interior field and more opportunities to reuse cut pieces. Subtract 1 to 2 percent.
Project Dimensions Relative to Paver Size
If the project length or width does not divide evenly by the paver size plus joint width, entire rows may need trimming at one or both ends.
Add 2 to 6 percent when the dimensions are clearly incompatible with the paver module.
Pattern Alignment Requirements
If the project must center on a doorway, align to a walkway, or create a precise visual symmetry, more partial pieces are discarded to achieve a clean layout.
Choosing a Final Waste Factor
A simple method is:
- Begin with the waste factor range for your paver layout pattern.
- Apply adjustments for shape, project size, dimension fit, and alignment.
- Round up to the nearest whole percent for ordering.
Most residential installations fall between 5 and 15 percent after adjustments.
More complex shapes and radial patterns often require higher percentages due to unavoidable trimming.
Joint Size Tips
Choosing an appropriate joint width helps your paver surface stay stable, drain properly, and maintain a clean, consistent appearance. Joints that are too narrow or too wide can affect long-term performance. The points below explain why joint size matters and how to select a workable gap for your project.
Typical Joint Widths
- Tight joints: 0 to 1/16 inch
Used with smooth, precisely manufactured pavers. Produces a very close-fitted surface. Requires careful installation and may show small alignment differences. - Standard joints: 1/8 inch
The most common choice for patios and walkways. Works with nearly all concrete pavers. Provides enough space for sand or polymeric sand to interlock and help resist movement. - Wide joints: 3/16 to 1/4 inch
Useful for textured or irregular pavers, or when slight variations in unit size need to be absorbed. Can improve drainage but may show more of the joint material.
When Wider Joints Are Intentional
Designers sometimes choose visibly wider joints for specific effects or materials:
- Natural stone
Hand-cut or irregular stone often uses joints from 1/4 inch to 1 inch. Wider joints help blend irregular edges and create a traditional stone-set look. - Mortared installations
When the pavers or stones are set in a mortar bed, larger joints can be easier to fill and tool. They can also help manage dimensional variation in natural stone. - Pattern emphasis
Wider joints can outline each unit more clearly, creating a pronounced pattern when desired.
Factors That Influence Joint Size
- Paver shape and manufacturing tolerances
Units with uniform edges allow tighter joints. Tumbled or rustic pavers typically require wider spacing. - Intended use
Foot-traffic areas usually allow tighter joints. Driveways often benefit from standard or slightly wider joints for added stability. - Infill material
Polymeric sand performs best within typical 1/8 to 3/16 inch gaps. Very tight joints may not accept enough material, while wider joints may require placing the material in two lifts.
Practical Guidance
- Start with 1/8 inch for most dry-laid concrete paver projects.
- Increase to 3/16 inch if the pavers vary in size or a slightly more defined separation line is preferred.
- Use 0 to 1/16 inch only when the pavers are manufactured for tight joints and installation precision is high.
- For natural stone set in mortar, joint widths from 1/4 inch to 1 inch may be appropriate depending on the material and pattern.
Paver System Components & Installation Tips
Under patio or driveway pavers, you need a layered base system designed to handle load, allow drainage, and prevent shifting or settling. Each layer serves a specific purpose, and the correct materials depend on whether it’s a patio (light duty) or driveway (heavy duty) installation.
1. Subgrade (Native Soil Layer)
Purpose:
This is the natural ground beneath the project. It supports the entire base system.
Preparation:
- Excavate to the required depth (typically 7–9 in. for patios; 11–13 in. for driveways).
- Remove all organic material, roots, and soft soil.
- Compact the subgrade using a plate compactor or roller to achieve a firm, stable surface.
Optional:
Lay geotextile fabric if the soil is clayey or prone to shifting. It prevents the base gravel from mixing with the soil, helps prevent weeds from growing, and helps your paver installation last longer.
2. Base Layer (Crushed Stone or Gravel Base)
Material:
Use crushed stone with angular edges, not round gravel. The most common base material is ¾” (19 mm) crushed stone, sometimes called “crusher run” or “Class 5 road base.”
Depth:
- Patios/Walkways: 4–6 inches
- Driveways: 8–12 inches
Thicker bases are used in colder climates to prevent frost heave.
Installation:
- Place the crushed stone in 2–3 inch lifts.
- Compact each lift thoroughly before adding the next layer.
- Slope the base 1–2% away from structures for drainage.
3. Bedding Layer (Setting Bed)
Material:
A thin layer of coarse sand, concrete sand, or stone screenings (⅜” minus).
Avoid fine play sand – it compacts poorly and traps water.
Depth:
- Typically 1 inch after compaction.
Purpose:
- Provides a smooth, level surface for the pavers.
- Allows minor adjustments in height and slope.
4. Pavers (Surface Layer)
Material:
Concrete, clay brick, or natural stone pavers.
Installation:
- Lay the pavers in the desired pattern on the bedding layer.
- Use edge restraints (plastic, concrete, or metal) to prevent lateral movement.
5. Paver Joint Material
Options:
- Regular jointing sand
- Polymeric sand (This is the recommended material, and this is a good product)
- Stone dust
- Permeable stone chips (for permeable systems)
- Mortar joints (used for certain brick or stone installations where a rigid, non-flexible joint is desired)
- Cementitious grout (used for some natural-stone applications, pool decks, or when a fully locked, sealed joint is required)
Sweep sand, dust, and chips into the joints and compact again to lock the pavers.
Mortar and grout notes:
- Mortar and grout require different installation methods than sand:
- Joints must be fully packed and tooled.
- Mortar/grout can restrict drainage and create a rigid surface, so they are usually paired with a concrete slab base rather than a flexible crushed-stone base.
- They are not recommended for freeze–thaw climates unless designed for that purpose.
- Because mortar and grout joints are rigid, they are prone to cracking when placed over a flexible crushed-stone base or where minor settlement or movement occurs. Even well-installed rigid joints can develop hairline cracks over time due to thermal expansion, base movement, moisture cycling, or freeze–thaw action, which places repeated expansion pressure on the joint material.
When mortar or grout is appropriate:
Mortared or grouted joints are best used when the paver system is installed over a rigid concrete slab rather than a flexible crushed-stone base. This prevents differential movement and helps minimize cracking. These materials are commonly used for:
- Brick or stone patios built on a concrete slab
- Pool decks requiring fully sealed joints
- Natural-stone installations where a tight, monolithic appearance is desired
- Areas where weeds or ants are a major concern and a rigid joint is preferred
Summary Table
| Layer | Material | Typical Depth (Patio) | Typical Depth (Driveway) | Purpose |
|---|---|---|---|---|
| Subgrade | Compacted native soil, graded and sloped | N/A | N/A | Supports the entire pavement system and carries all loads |
| Geotextile (optional) | Woven or nonwoven separation fabric | N/A | N/A | Prevents soil mixing with base stone and improves stability and drainage |
| Base | ¾ in crushed stone (crusher run or road base) | 4–6 in | 8–12 in | Provides strength, drainage, and frost protection for the paver system |
| Bedding | Concrete sand (ASTM C33) or stone screenings | 1 in | 1 in | Creates a smooth, level setting bed and fine tunes slope |
| Pavers | Concrete, clay brick, or natural stone units | 2–3 in | 2–3 in | Finished wear surface that carries traffic and interlocks under load |
| Joint filler | Jointing sand, polymeric sand, or small stone chips | N/A | N/A | Locks pavers together, supports load transfer, and reduces erosion and weed growth |
| Edging (edge restraint) | Steel, aluminum, plastic, or concrete edging | Installed flush with paver height, anchored into base | Installed flush with paver height, anchored into base | Prevents lateral movement of pavers and preserves the shape of the paved area |
Edging (Edge Restraints) for Paver Systems
Edging keeps the paver field from spreading outward under load. Without a solid edge restraint, even a well-compacted base can allow gradual lateral movement that leads to joint widening, shifting pavers, or failure of the pattern interlock. A properly installed edge restraint is essential for both patios and driveways
What edging does:
- Prevents pavers from creeping outward under foot or vehicle loads
- Maintains crisp, straight lines or curved shapes
- Preserves the integrity of interlocking patterns
- Helps prevent joint sand loss at the perimeter
- Supports long-term stability of the entire installation
Common Edging Materials
1. Steel Edging
- Very strong and durable
- Creates the cleanest, sharpest perimeter lines
- Works well for both straight and curved installations
- Usually anchored with long steel spikes through pre-punched holes
- Excellent for driveways or any installation where movement resistance is critical
2. Aluminum Edging
- Lightweight but strong
- Corrosion-resistant
- Flexible enough for curved designs
- Easier to cut and shape than steel
- Good choice for patios, walkways, and residential driveways
3. Concrete Edge Restraints (Mortared or Extruded Concrete)
- Forms a solid, continuous barrier
- Very strong, suitable for heavy-duty loads
- Ideal for driveways and large patios
- Can be hidden below the paver edge or finished visibly as a border ribbon
- Long cure time; must be placed carefully to avoid cracking
4. Plastic/PVC Edging Strips
- Affordable and widely available
- Flexible for curves and easy to install
- Suitable for patios and walkways
- May not be strong enough for high-load driveways unless using a heavy-duty type
- Requires frequent anchoring spikes for best stability
5. Permeable Paver Edge Blocks or Curb Stones
- Designed specifically for permeable systems
- Allow water to escape through gaps or weep holes
- Provide strong lateral support in eco-friendly or drainage-focused installations
Installation Guidelines
- Install edging after the pavers are laid and the field is aligned properly, but before final compaction.
- Drive 12–14 in. spikes (or manufacturer-recommended length) through anchor points and into the base layer, not just the loose soil.
- Place spikes every 8–12 inches for plastic edging, and every 12–16 inches for steel or aluminum.
- For curves, use additional spikes to maintain stability.
- Ensure edging is flush with the top of the pavers or slightly lower so it remains hidden by the final surface.
- Backfill the outside of the edging with soil or stone to lock it in place.
When to Use Heavy-Duty Edging
- Vehicle areas (driveways, parking pads)
- Large patios where pattern interlock must remain tight
- Patterns with angled termination lines (e.g., herringbone)
- Any installation with noticeable grade changes or curves
When Minimal Edging Might Be Enough
- Very small patios
- Areas fully surrounded by permanent hardscape or walls
- Projects with tight retaining edge blocks already in place

About the Author
Jack Gray spent 20 years as a principal roof consultant with the Moriarty Corporation, an award-winning building enclosure consultant firm founded in 1967. Mr. Gray has worked in the roofing industry for over 25 years, with training and practical experience in roof installation, roof inspection, roof safety, roof condition assessment, construction estimating, roof design & specification, quality assurance, roof maintenance & repair, and roof asset management. He was awarded the Registered Roof Observer (RRO) professional credential in 2009. He also served as an infantry paratrooper in the 82nd Airborne Division and has a B.A. from Cornell University.