Table of Contents
What is a Roof Scupper?
The International Building Code defines a roof scupper as “an opening in a wall or parapet that allows water to drain from a roof.”
Roof scuppers are occasionally referred to as “roof scupper drains” or just “scupper drains,” for obvious reasons. Scuppers do drain the roof, but it is incorrect to call them drains. “Roof drain” refers to a component that allows water to drain through the roof, not off the side of it.
Roof scuppers with spouts that project out beyond the wall are known as “roof canales” in the American Southwest, where they are often used for rainwater collection.
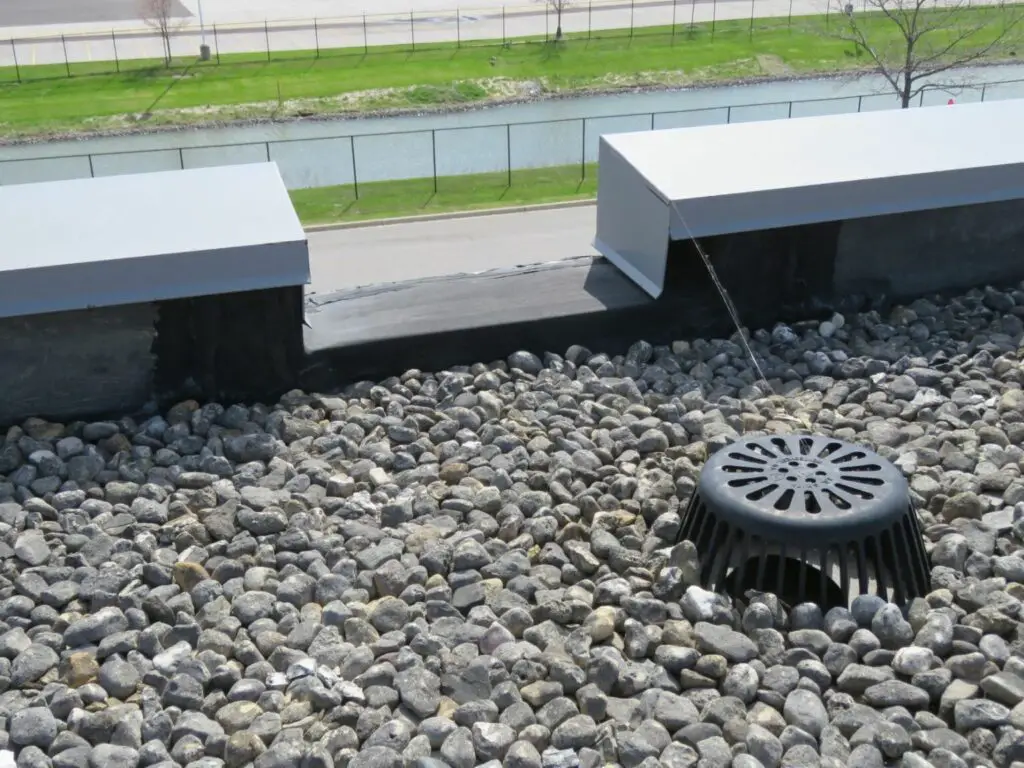
Scuppers provide a pathway for water to flow through parapet walls or any other raised edge around a roof, such as gravel stop edge metal. They are commonly used in both primary and secondary drainage systems and can be essential for preventing water accumulation that may lead to structural damage.
Primary roof scuppers normally channel water off a low-slope (“flat”) roof into a conductor box that connects to a downspout or a gutter. Overflow roof scuppers will let the water run freely (and visibly) down the side of the building. In many cases, overflow scuppers are a code requirement; they serve as an emergency drainage system when primary scuppers or drains become blocked. The size and placement of overflow scuppers must be carefully calculated to ensure they provide adequate drainage capacity.
A roof scupper is usually part of a peripheral roof drainage system, which is a roof drainage system in which the water drains off the sides of the roof, instead of down through the roof itself using drains (an internal roof drainage system). This type of drainage solution is often necessary in buildings where an internal roof drainage system would be difficult to configure, unacceptably expensive, or difficult to access.
Scuppers also help reduce the risk of leaks inside the building that may occur with internal drains. Internal drains, by their nature, require penetrations through the roof membrane and sometimes complicated roof leader configurations with multiple joint couplings in the drain pipe as the pipe is routed through the building to its final discharge location.
Where flat roof sections on the same building are separated by walls, there will often be scuppers in the walls that allow water to drain from one flat roof section to another. This design helps manage water flow efficiently in multi-level roof structures and prevents excessive water buildup in isolated roof areas. Properly designed scupper systems can reduce the risk of ponding water.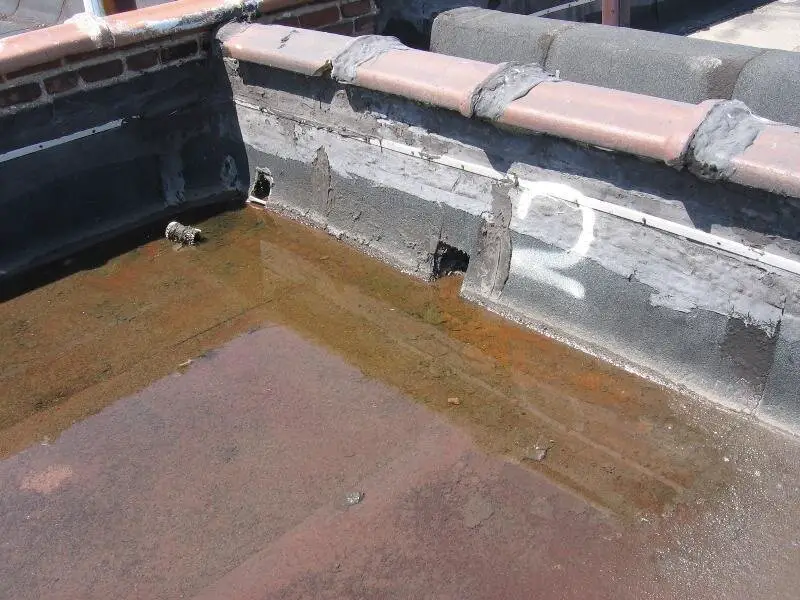
Types of Roof Scuppers
Roof scuppers mainly come in two forms: the open scupper (a 3-sided scupper, open at the top, also called a “channel-type” scupper), or the through-wall scupper (basically a hole in the wall, usually rectangular). Channel-type scuppers are normally use when the parapet wall at the edge of the roof is too low to accommodate thru-wall scuppers because it’s lower than the required height of the scupper, or forming the hole in the wall for the scupper would compromise the structural integrity of the wall above it.
Occasionally, you’ll see a round roof scupper or a decorative scupper in some other shape. Architectural styles sometimes dictate the use of ornamental scuppers, which can feature custom shapes, decorative metalwork, or extended spouts to create a more visually appealing water flow. These are particularly common in historic restorations and high-end commercial buildings.
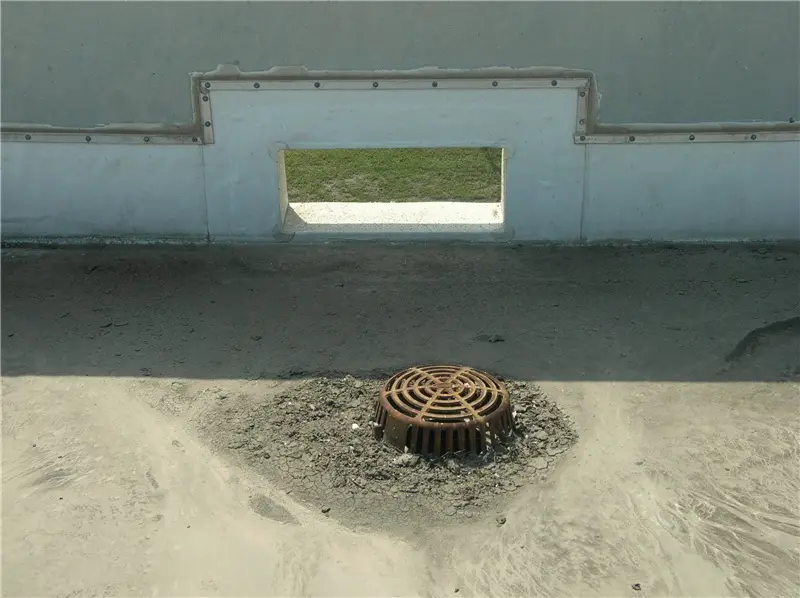
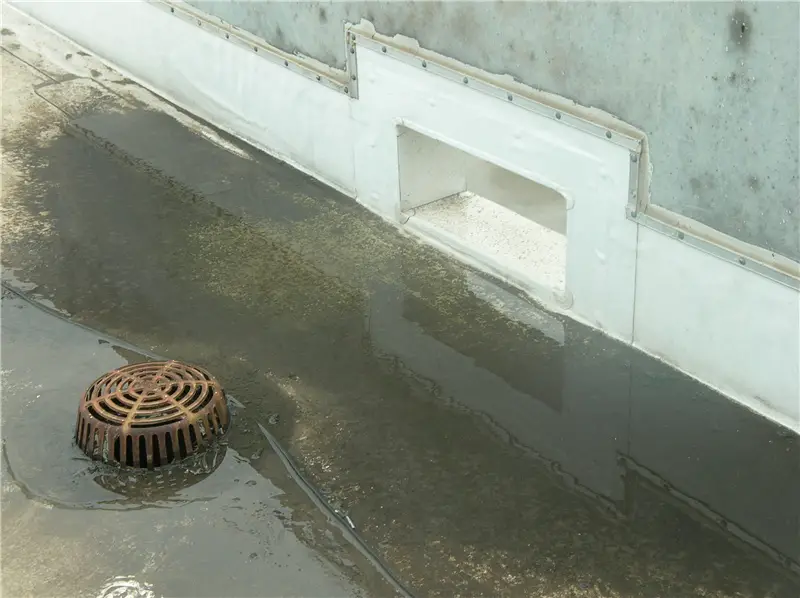
Through-Wall Roof Scuppers
Through-wall (or “thru-wall”) scuppers are typically lined with sheet metal such as galvanized steel or copper. Aluminum is not normally used, because it’s more difficult to form and solder aluminum on site than other metals used in roof construction. Aluminum’s susceptibility to galvanic corrosion when in contact with dissimilar metals can further limit its use as a scupper box material.
This metal component is called a “scupper box.” The scupper box is integrated with the roof system (flashed, or “stripped in”) on the interior side of the wall, and usually terminates on the outside of the wall with a faceplate with sealant around it. For the best performance, the scupper box can be installed with a sloped bottom to promote better drainage and minimize standing water inside the scupper.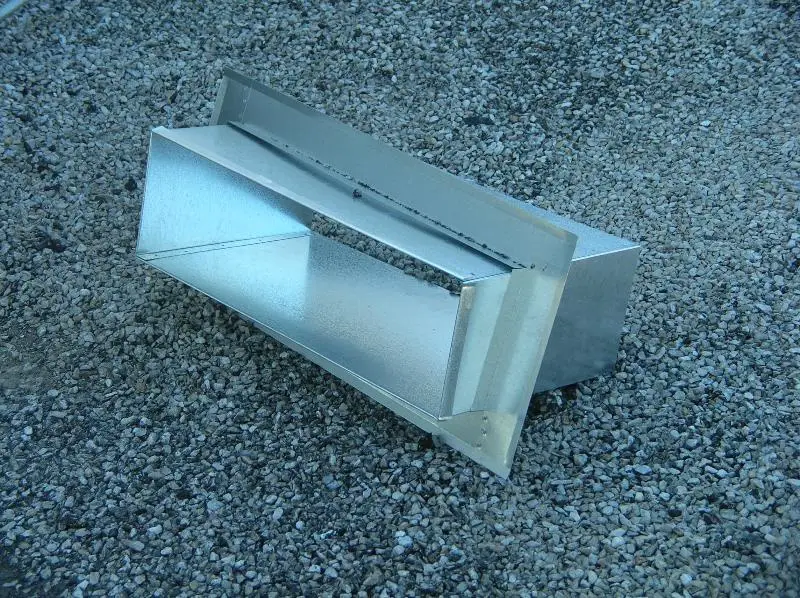
Channel-Type Roof Scuppers
Channel-type roof scuppers are also typically lined with metal, but the metal is integrated with the coping or other edge metal as well as being flashed into the roof membrane.
Less commonly, other materials, such as liquid-applied waterproofing resin, are used to line the roof scupper hole. This approach is particularly useful in retrofit applications where integrating new metal components into an existing system may be challenging or where additional flexibility is required to accommodate thermal expansion.
Often with single-ply roof membranes such as PVC roofing or EPDM, the roof membrane material will continue inside the scupper, lining the entire exposed surface of the scupper box, bonded to the metal. This fully adhered approach enhances waterproofing by limiting exposed metal and reducing the risk of corrosion and leaks. Proper termination and adhesion of the membrane within the scupper are critical to maintaining its long-term performance.
Roof Drainage Systems and Scuppers
Scuppers will play one of two roles in a roof system: they will either be a part of the primary roof drainage system, or they will be a part of the secondary (overflow) roof drainage system. Both systems must be designed to independently handle the anticipated volume of water based on rainfall intensity, roof slope, and roof area for effective stormwater management and to prevent structural stress on the roof.
A primary drainage system will simply be designed to remove water from the roof as quickly as possible. This system must be capable of handling the full design rainfall event for the building’s location, directing water away from the roof in a controlled manner. Primary drainage is essential for preventing ponding water loads on the roof, as well as protecting the roof from excessive water exposure, which can degrade roofing materials over time.
An overflow drainage system will be designed as a complete second drainage system which functions independently of the primary system. This redundancy is critical, especially in areas prone to heavy rainfall, where clogged or obstructed primary drains could otherwise quickly lead to dangerous water accumulation. Building codes in most jurisdictions require an independent overflow system as a safeguard against catastrophic roof collapse.
The overflow drainage system’s purpose is to drain water from the roof if the primary drains or scuppers become blocked so the roof structure doesn’t become overloaded by the weight of the water. Besides the risk of roof collapse, chronic overloading can lead to deformation (permanent deflection) of the roof structure. Water weighs approximately 5.2 pounds per square foot for every inch of depth, meaning that even minor ponding can add significant stress to the structure. Prolonged ponding can also accelerate deterioration of roofing membranes and lead to leaks.
Note that if you’re standing on the ground and look up and see that the scuppers in the parapet wall are all solo scuppers, then the scuppers on that roof are probably the secondary drainage system, and the roof probably has internal drains. Internal roof drains typically eventually connect to underground piping systems, directing water safely away from the foundation. If these internal drains become clogged, the overflow scuppers ensure that water still has a way to exit the roof.
If the scuppers are all in pairs close together at every location, then one of those scuppers will normally be a part of the primary drainage system and the one next to it is an overflow scupper. The overflow scupper will be positioned slightly higher, ensuring it only becomes active when the primary drainage system is overwhelmed or obstructed. In well-designed systems, the overflow scuppers should be able to handle the full capacity of the roof drainage demand in an emergency situation.
Occasionally, there will be two scuppers right next to each other which both serve the same purpose and are the same height off the roof. This usually happens when an insurance company determines that the original roof scupper wasn’t big enough due to code changes or updates to the insurance company’s loss prevention standards. This is often seen in buildings that have undergone renovations or additions where the original drainage calculations no longer meet updated requirements. In some cases, structural changes to the building or modifications to the roofing system may also necessitate additional scuppers to maintain adequate drainage.
When this happens, the building owner has to increase the drainage system capacity by enlarging the scupper holes or adding new scuppers next to the existing ones. This modification must comply with local building codes and industry standards, ensuring that the updated drainage system is properly integrated into the existing roofing and waterproofing assemblies. Failure to do so can result in improper water flow, increased risk of leaks, or even structural damage.
Location of Primary Scuppers
Primary roof scuppers are used in place of internal roof drains (for various reasons). Primary scuppers will be the main drainage element for the roof areas they serve. Their sizing and placement are critical.
Scuppers that are part of the primary drainage system are installed so that the bottom edge of the roof scupper holes are even with the surface of the roof. In many cases, the scupper opening will be slightly tapered or sloped to encourage continuous water flow and reduce the likelihood of debris accumulation that could lead to blockages.
All roofs (even “flat” roofs slope a little bit) will slope down to the primary scuppers. The scuppers will be located in the parapet wall at the lowest points of the roof. This ensures efficient drainage, preventing water from accumulating in unintended areas. Proper slope is typically achieved using tapered insulation or slight structural design adjustments to the roof deck, helping to direct water flow naturally toward the drainage points.
Location of Secondary (Overflow) Scuppers
Scuppers that are part of the overflow drainage system are also installed at the lowest points of the roof, but slightly higher than the level of the roof surface. They are typically positioned about two inches above the primary drainage system to prevent them from serving as the main outlet under normal conditions. This ensures that they only activate in cases of excessive rainfall or blockages in the primary system.
They are typically installed at a point in the parapet wall that is as close as possible to the primary drain for that area. The overflow scupper is located as close to the primary drain as possible so that it will drain the same roof area that the drain does if the drain becomes clogged. By placing the overflow scuppers near the primary drains, the system ensures that water does not become trapped in areas where it cannot be effectively removed, reducing the risk of ponding and structural damage.
If scuppers are used as the primary drainage system instead of internal drains, the overflow scuppers will usually be very close to or right next to the primary scuppers which drain the same roof area, but the bottom of the secondary scupper holes will be a little higher.
The bottom edges of the overflow scuppers that you see on existing buildings today will almost always be about two inches above the adjacent roof surface. Two inches is a customary rule of thumb, but the actual height difference should be carefully calculated based on expected rainfall, roof slope, building codes, and loss prevention guidelines. You want to make sure that overflow scuppers only engage when necessary but are not too high to engage when needed.
The height difference prevents overflow scuppers from acting as primary drains. If overflow scuppers were positioned too low, they would constantly allow water to exit, defeating their intended purpose. Since water flowing through an overflow scupper is not normally captured by a conductor head or gutter, separating the primary and overflow scuppers this way prevents unnecessary water discharge onto building facades, which could lead to staining, ice formation in colder climates, or erosion of landscaping below.
Sometimes water can’t flow directly to the wall because of an obstruction (such as a curbed expansion joint, for example) between the primary drain and the wall. In this case, the overflow scupper will be installed in the wall at the nearest, lowest part of the roof that water can directly flow to from the drain location. This ensures that water always has a clear path to exit the roof, even in complex roof geometries or multi-level roof systems.
Overflow scuppers should only drain the roof if the primary drains or primary scuppers are blocked and water is ponding on the roof as a result. To ensure they remain functional, regular maintenance is essential. Leaves, debris, and ice buildup can obstruct both primary and overflow scuppers, so periodic inspections and cleaning are necessary for maintaining effective drainage. In high-precipitation regions, additional design measures such as scupper covers or screens may be used to prevent clogging while still allowing unrestricted water flow.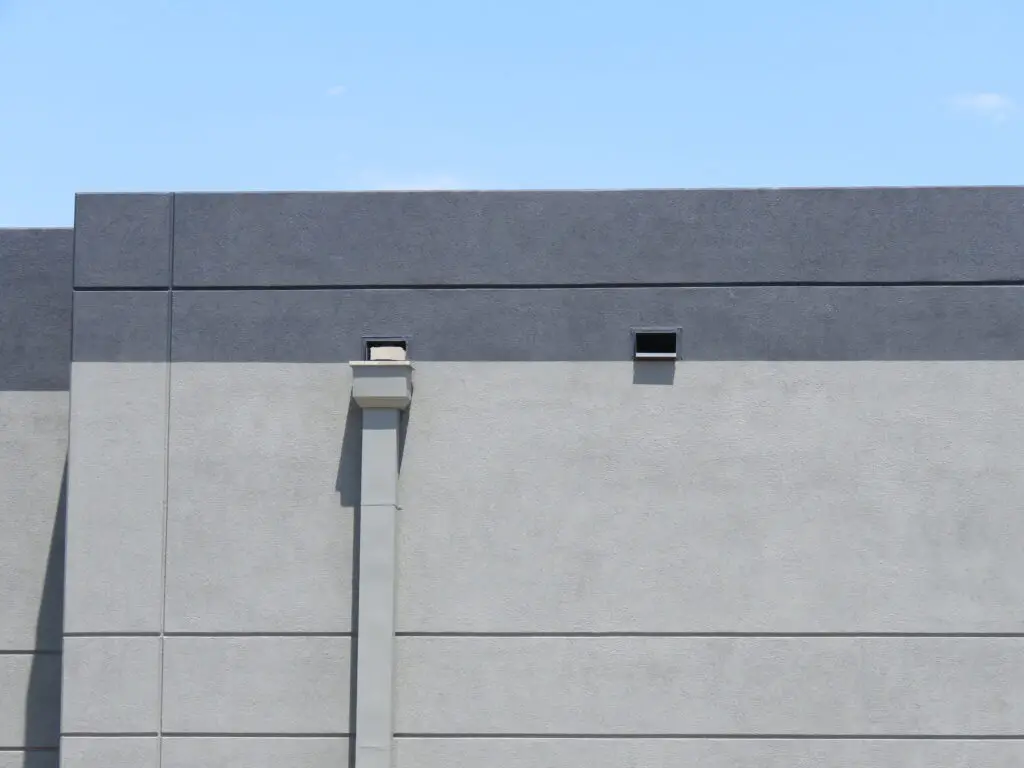
Roof Scupper Code Requirements
There are different code requirements for scuppers depending on which role they play. These requirements address factors such as minimum size, placement, flow capacity, and installation details to ensure compliance with structural and stormwater management standards. While building codes establish baseline requirements, additional guidelines from engineering and insurance entities, such as FM Global and ASCE 7, offer more precise recommendations tailored to specific building types and climate conditions.
It’s important to note that the language regarding both primary and overflow scuppers in the 2021 version of the International Plumbing Code states that:
Where scuppers are used for primary roof drainage or for secondary (emergency overflow) roof drainage or both, the quantity, size, location and inlet elevation of the scuppers shall be chosen to prevent the depth of ponding water on the roof from exceeding the maximum water depth that the roof was designed for as determined by Section 1611.1 of the International Building Code. Scupper openings shall be not less than 4 inches (102 mm) in height and have a width that is equal to or greater than the circumference of a roof drain sized for the same roof area. The flow through the primary system shall not be considered when locating and sizing secondary scuppers.”
This is not very helpful if you don’t have access to the structural design specifications for the building. Because these calculations involve live and dead load considerations, expected rainfall rates, and drain capacity, engineers typically perform hydraulic calculations to ensure compliance. If structural documentation is unavailable, a professional assessment may be necessary to confirm that the existing drainage system meets modern safety requirements.
The rule of thumb that the bottom of the scupper should be two inches above the level of the roof was standard in the roofing industry for decades and may still be the code requirement in some jurisdictions, depending on the version of the code currently in use. Recent updates to model codes have allowed for alternative configurations, provided they meet structural load and hydraulic performance requirements.
Roof Scupper Size
The only unconditional guideline for roof scupper sizing provided by the code is that:
“Scupper openings shall be not less than 4 inches (102 mm) in height and have a width that is equal to or greater than the circumference of a roof drain sized for the same roof area.”
So we can at least be absolutely certain that round scuppers can’t have a diameter of less than 4 inches, and the height of rectangular scupper holes can’t be less than 4 inches. However, this is a minimum requirement, and larger scuppers are almost always necessary.
If you do know the diameter of a properly sized drain for a particular roof area, however, you can easily calculate the required size of the equivalent roof scupper using the circumference guideline above. For example, if a roof drain for a given area has a 6-inch diameter, the scupper width must be at least equal to the drain’s circumference, which is approximately 18.85 inches (6 inches × π).
If you need to install an overflow scupper for a roof area that already has a roof drain, and you are certain that the existing roof drain is the proper size required by code, you can use that 4-inch height × circumference rule to determine the size of your new scupper. This ensures that the overflow drainage system has at least the same capacity as the primary drainage system. Some jurisdictions may also require overflow scuppers to be slightly larger than primary scuppers to handle emergency drainage conditions more effectively.
While the International Building Code provides a basic requirement for scupper sizing, additional standards such as ASCE 7 (Minimum Design Loads for Buildings and Other Structures) and the National Roofing Contractors Association (NRCA) guidelines offer more detailed engineering considerations. Local codes may also impose stricter size requirements depending on factors like regional rainfall data and historical drainage performance issues.
If you’re looking for extensive technical guidelines for sizing and locating scuppers, FM Global’s “DS 1-54 Roof Loads for New Construction” (Data Sheet) is an excellent resource. This document includes additional factors such as wind loads, snow accumulation, and long-term durability considerations, making it a valuable tool for engineers and designers working on commercial and industrial buildings.
Drain and Scupper Sizing by Roof Area and Rainfall
The table below provides a few common examples of roof areas, rainfall intensities, and the corresponding minimum drain and minimum scupper sizes. It does not show every possible combination and should be used only for general guidance.
Rainfall intensity matters because heavier rainfall requires larger drains and/or scuppers to get water off the roof quickly enough to prevent ponding or overflow. The correct design rainfall rate for your location is the 100-year, 1-hour rainfall published in ASCE 7 and referenced by the International Building Code (IBC). Local building departments or plumbing codes should be able give you the exact value that applies to your project site.
Both ASCE 7 and the International Building Code (IBC) rely on the official rainfall data maintained by the National Oceanic and Atmospheric Administration (NOAA). You may just want to go straight to the NOAA website and see if you feel comfortable reading their charts. You can look up the 100-year, 1-hour rainfall rate for your location on the NOAA website here.
Always size roof drains and scuppers according to the plumbing code adopted in your jurisdiction. The example values below are based on the International Plumbing Code (IPC) Section 1106 and Table 1106.2(1) for drain sizing, together with the rainfall intensity data specified in ASCE 7.
Always size roof drains and scuppers according to the requirements of the plumbing code adopted in your jurisdiction and the rainfall rates that apply to your project location. The values in this table are based on the International Plumbing Code (IPC), Section 1106 and Table 1106.2(1) for drain sizing, and the rainfall intensity data specified in ASCE 7 and referenced by the International Building Code (IBC).
| Roof Area vs Required Drain Diameter and IPC §1106.5 Scupper Opening | ||||
|---|---|---|---|---|
| Roof Area (ft²) | 2 in/hr | 3 in/hr | 4 in/hr | 5 in/hr |
| 1,000 ft² | Required drain diameter:2 in Min scupper opening:4 in × 6.3 in | Required drain diameter:3 in Min scupper opening:4 in × 9.4 in | Required drain diameter:3 in Min scupper opening:4 in × 9.4 in | Required drain diameter:3 in Min scupper opening:4 in × 9.4 in |
| 2,500 ft² | Required drain diameter:3 inMin scupper opening:4 in × 9.4 in | Required drain diameter:3 inMin scupper opening:4 in × 9.4 in | Required drain diameter:4 inMin scupper opening:4 in × 12.6 in | Required drain diameter:4 inMin scupper opening:4 in × 12.6 in |
| 5,000 ft² | Required drain diameter:4 inMin scupper opening:4 in × 12.6 in | Required drain diameter:4 inMin scupper opening:4 in × 12.6 in | Required drain diameter:5 inMin scupper opening:4 in × 15.7 in | Required drain diameter:5 inMin scupper opening:4 in × 15.7 in |
| 7,500 ft² | Required drain diameter:4 inMin scupper opening:4 in × 12.6 in | Required drain diameter:5 inMin scupper opening:4 in × 15.7 in | Required drain diameter:5 inMin scupper opening:4 in × 15.7 in | Required drain diameter:6 inMin scupper opening:4 in × 18.8 in |
| 10,000 ft² | Required drain diameter:5 inMin scupper opening:4 in × 15.7 in | Required drain diameter:5 inMin scupper opening:4 in × 15.7 in | Required drain diameter:6 inMin scupper opening:4 in × 18.8 in | Required drain diameter:6 inMin scupper opening:4 in × 18.8 in |
| 15,000 ft² | Required drain diameter:5 inMin scupper opening:4 in × 15.7 in | Required drain diameter:6 inMin scupper opening:4 in × 18.8 in | Required drain diameter:8 inMin scupper opening:4 in × 25.1 in | Required drain diameter:8 inMin scupper opening:4 in × 25.1 in |
| 20,000 ft² | Required drain diameter:6 inMin scupper opening:4 in × 18.8 in | Required drain diameter:8 inMin scupper opening:4 in × 25.1 in | Required drain diameter:8 inMin scupper opening:4 in × 25.1 in | Required drain diameter:8 inMin scupper opening:4 in × 25.1 in |
Roof Scupper Tips
Scupper Maintenance
Sealant Deterioration: The sealant around the flange or faceplate on the exterior wall surface around a thru-wall scupper is a maintenance item.
Sealant deteriorates over time. It’s important to check the condition of this sealant every year and replace it when it starts to go. In areas with extreme temperature fluctuations, sealant can crack or shrink more quickly, so semi-annual inspections may be necessary. UV exposure, moisture, and pollution can also accelerate degradation.
This sealant plays a critical role in preventing roof leaks. It keeps water from getting between the metal scupper box and the wall masonry, and then backing up into the roof system and into the building. If left unaddressed, deteriorated sealant can lead to trapped moisture, which may cause freeze-thaw damage, masonry spalling, or hidden mold growth inside the building envelope. Using a high-quality, UV-resistant sealant designed for exterior applications.
Read more about using building sealant.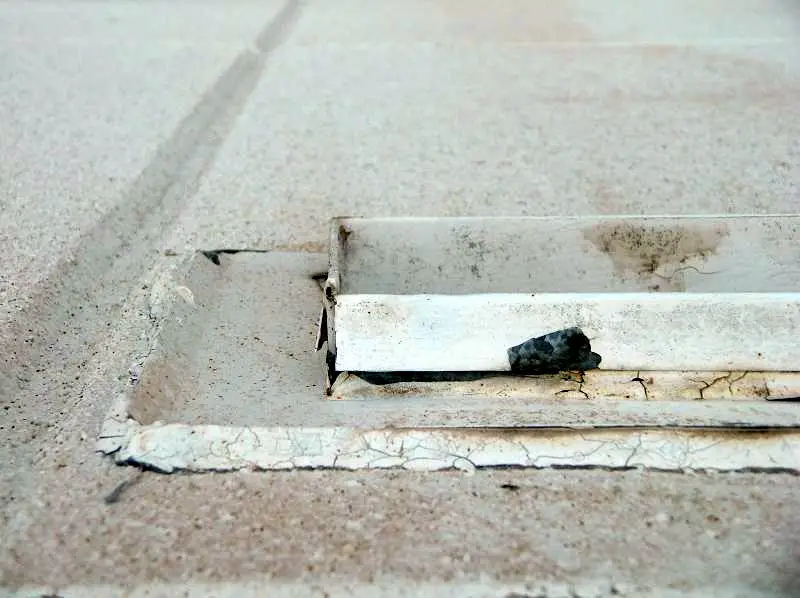
You can see the deteriorated building sealant and why it might be a problem.
Overflow Scuppers Can Tell You if the Drains are Clogged
Clogged Drains: Scuppers that serve as primary drainage components typically direct water into a conductor box, downspout, or a gutter (you don’t normally want to see water running down the side of your building or shooting out into the air like a miniature waterfall). If you do see water escaping from a primary scupper like this, it can indicate a misaligned or improperly sized scupper box or a partial blockage keeping the water from flowing as intended.
If interior roof drains are your primary drainage system, and the scuppers are your secondary drainage system, you do want to see this water coming out of the scuppers, because it lets you know that your drains are clogged. If overflow scuppers are actively discharging water, it’s a clear indication that immediate action is required to avoid potential roof overloading or structural damage due to standing water.
This is why overflow scuppers are basically just holes in the wall without a conductor head and downspout. You should have an unobstructed view of the overflow scupper openings from the ground. You want to be able to see if water is coming out of them, so you can tell right away if you need to get your primary drains cleaned.
You should also check your roof scuppers as well as your roof drains at least twice a year as part of a roof maintenance program. Remove any debris you find to prevent clogs and the chances of excess water accumulating on the roof. During inspections, ensure that scupper openings remain unobstructed and that flashing and sealant around the scuppers are intact to prevent water infiltration into the building envelope. A good maintenance program can prevent costly repairs and extend the life of your roofing system.
Ice Can Block Scuppers
Ice Build-Up: In colder climates, ice build-up at the scuppers in the winter can be a problem.
Due to the fact that the scuppers are in the wall and not over the heated part of the building, they tend to be colder than the rest of the roof. This makes them more susceptible to freezing, especially during periods of repeated thawing and refreezing. Cold air moving along the building’s exterior can accelerate ice formation at scupper openings.
Meltwater from snow on the roof may re-freeze at the scuppers and block water drainage. If water backs up behind an ice blockage, it can cause ponding on the roof, which increases the risk of structural damage. In some cases, ice damming at scuppers can redirect water into unintended areas, leading to leaks inside the building. It’s important to have your scuppers checked and cleaned if this situation applies. You made need to take steps such as installing heated cables around scupper openings to mitigate this issue. Regular winter inspections and clearing of snow accumulation near scuppers can also reduce the risk of ice-related blockages.
Scuppers and Roof Replacement
Re-Roofing: The existing scuppers in a parapet wall will have been designed for the height of the original (or previous) roof system. For roof systems that include above-deck insulation (which includes most commercial low-slope roofs), that can be a problem.
Recent changes to energy codes demand higher R-values, and therefore thicker roof insulation, which means that if you are replacing your roof, the surface of the new roof will probably be higher than the surface of the old roof.
This means that your primary thru-wall scuppers will be partially or even completely blocked by the new roof, and your overflow scuppers will no longer be at the proper height.
In order to comply with the building code, as well as common sense, you are probably going to have to raise the height of the scupper holes when you install a new roof. This adjustment often requires cutting new scupper openings in the parapet wall and installing properly sized scupper boxes or through-wall drainage assemblies. In some cases, if scupper height adjustments are not feasible, an alternative drainage method, such as installing internal roof drains, may be necessary.
Frequently Asked Questions
What is a roof scupper?
A roof scupper is an opening in a parapet or wall that allows water to drain from a flat or low-slope roof. It differs from a roof drain, which runs through the interior of the roof.
What are the types of roof scuppers?
There are two main types: channel-type scuppers (open at the top) and through-wall scuppers (a metal-lined opening through the wall). Decorative and round variations are also available.
What is the code requirement for scupper sizing?
Building codes require scupper openings to be at least 4 inches high and as wide as the circumference of a properly sized roof drain for the same roof area.
How do scuppers function in roof drainage?
Scuppers serve as either primary or overflow drainage. Primary scuppers channel water into conductor heads or downspouts, while overflow scuppers discharge excess water directly off the roof during emergencies.

About the Author
Jack Gray spent 20 years as a principal roof consultant with the Moriarty Corporation, an award-winning building enclosure consultant firm founded in 1967. Mr. Gray has worked in the roofing industry for over 25 years, with training and practical experience in roof installation, roof inspection, roof safety, roof condition assessment, construction estimating, roof design & specification, quality assurance, roof maintenance & repair, and roof asset management. He was awarded the Registered Roof Observer (RRO) professional credential in 2009. He also served as an infantry paratrooper in the 82nd Airborne Division and has a B.A. from Cornell University.